Getting Started with Gradle
向IntelliJ平台插件添加Gradle构建支持需要最近分发Gradle构建系统和IntelliJ IDEA(社区或旗舰版)。
1.0下载并安装IntelliJ IDEA
下载并安装IntelliJ IDEA Ultimate或IntelliJ IDEA Community Edition。
1.1确保启用“Gradle”和“Plugin DevKit”插件
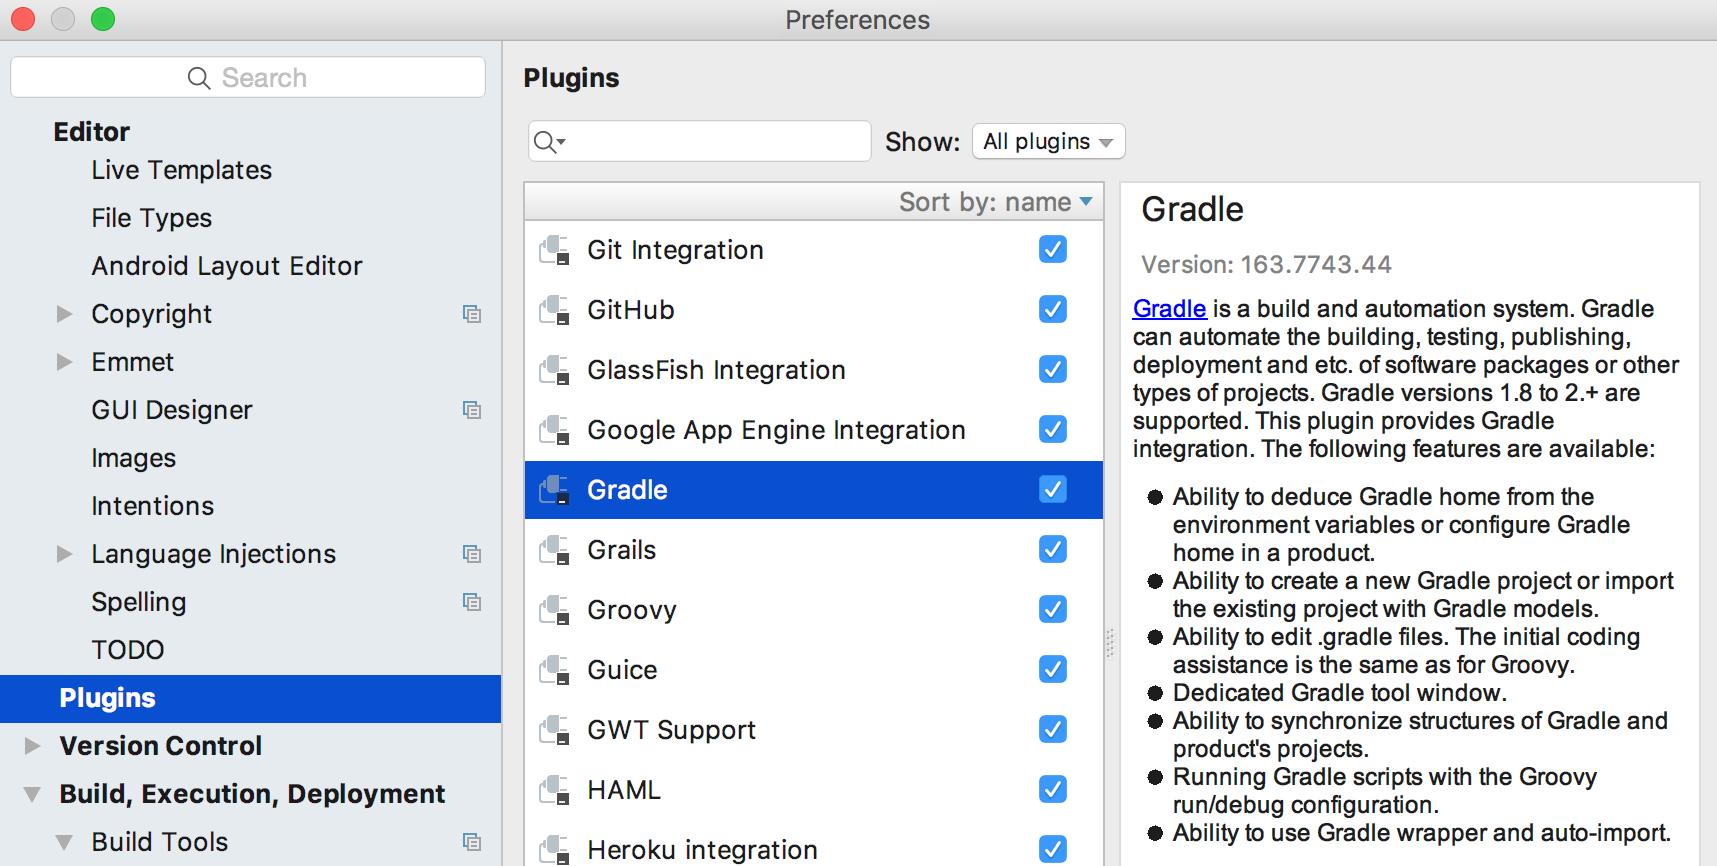
You can verify that the plugins are enabled by visiting Settings | Plugins.
1.2从Scratch创建一个插件项目
IntelliJ IDEA支持使用Gradle自动创建新的插件项目,并自动执行所有必需的build.gradle设置。
如果Gradle无法转换现有项目,这也可用于将现有插件转换为Gradle - 在这种情况下,您需要将源复制到新项目。
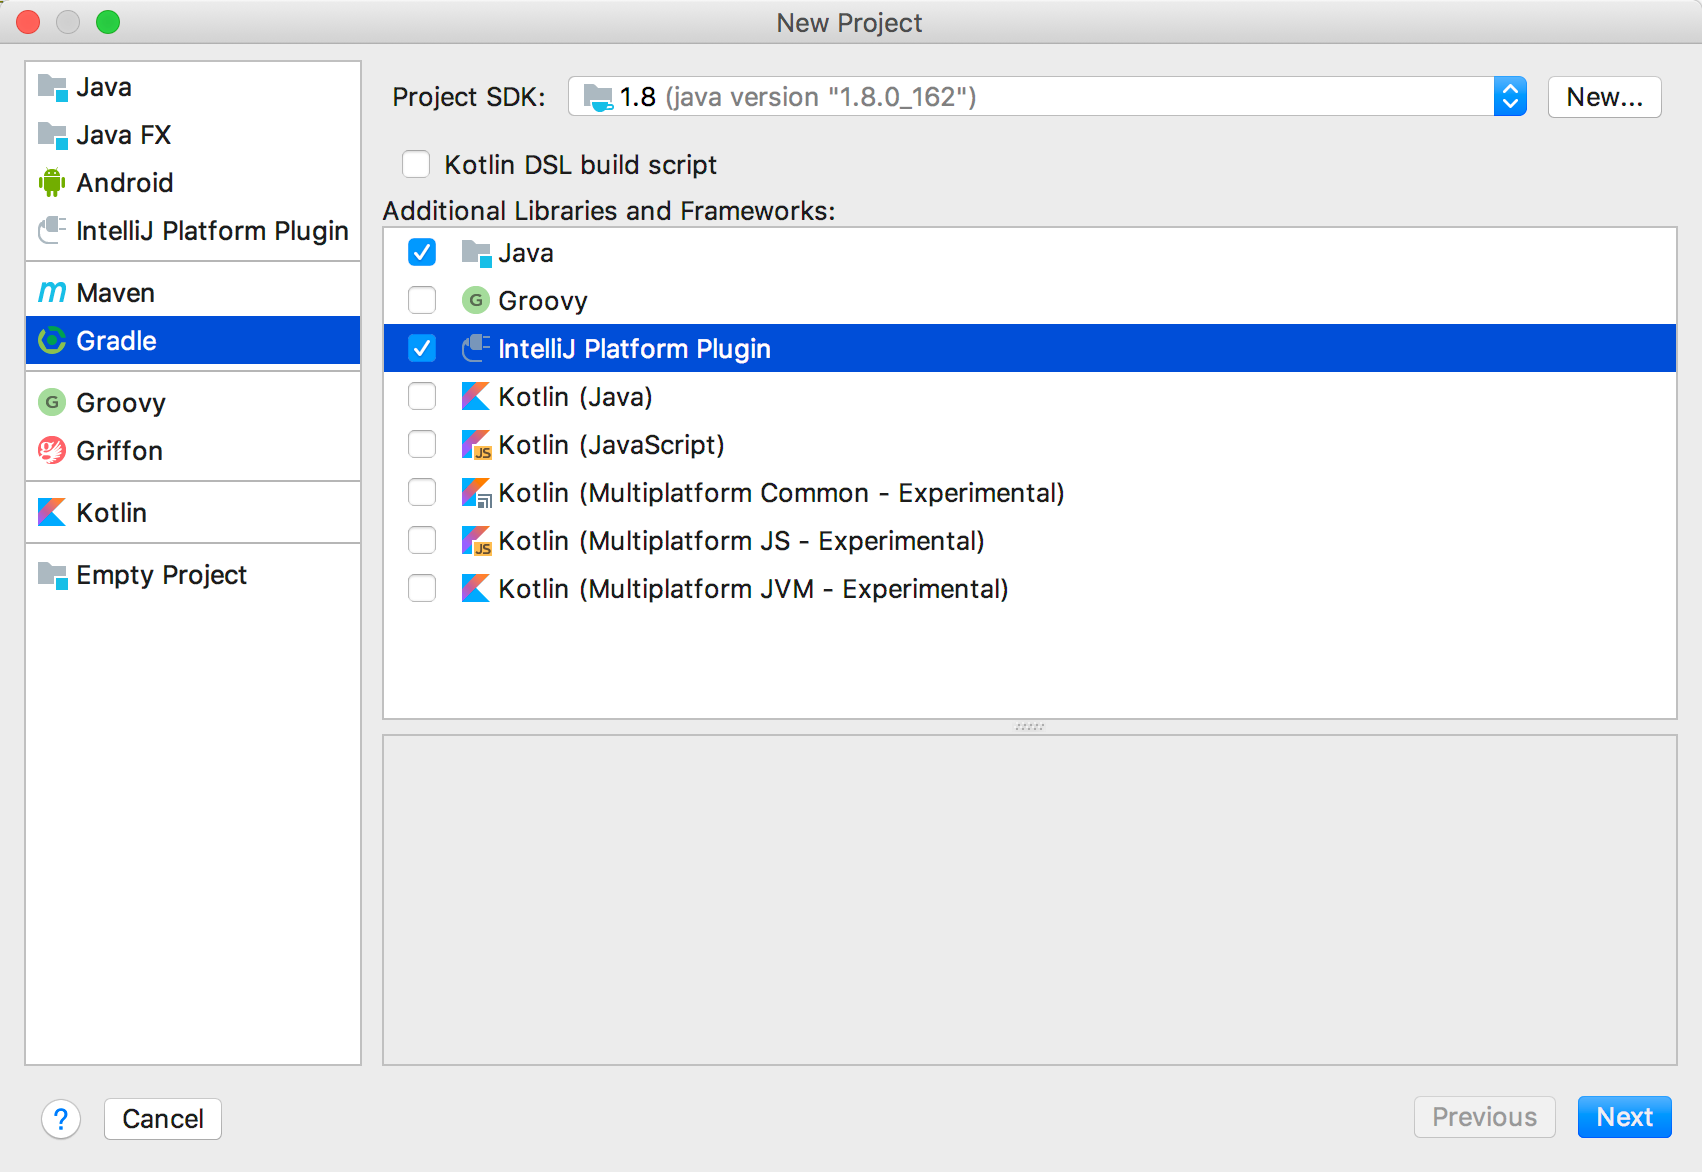
To do so, create a new project in IntelliJ IDEA by opening File | New… | Project, and select Gradle from the dialog box. In the “Additional Libraries and Frameworks” page, check “IntelliJ Platform Plugin”.
项目创建向导现在将指导您完成Gradle项目创建过程。
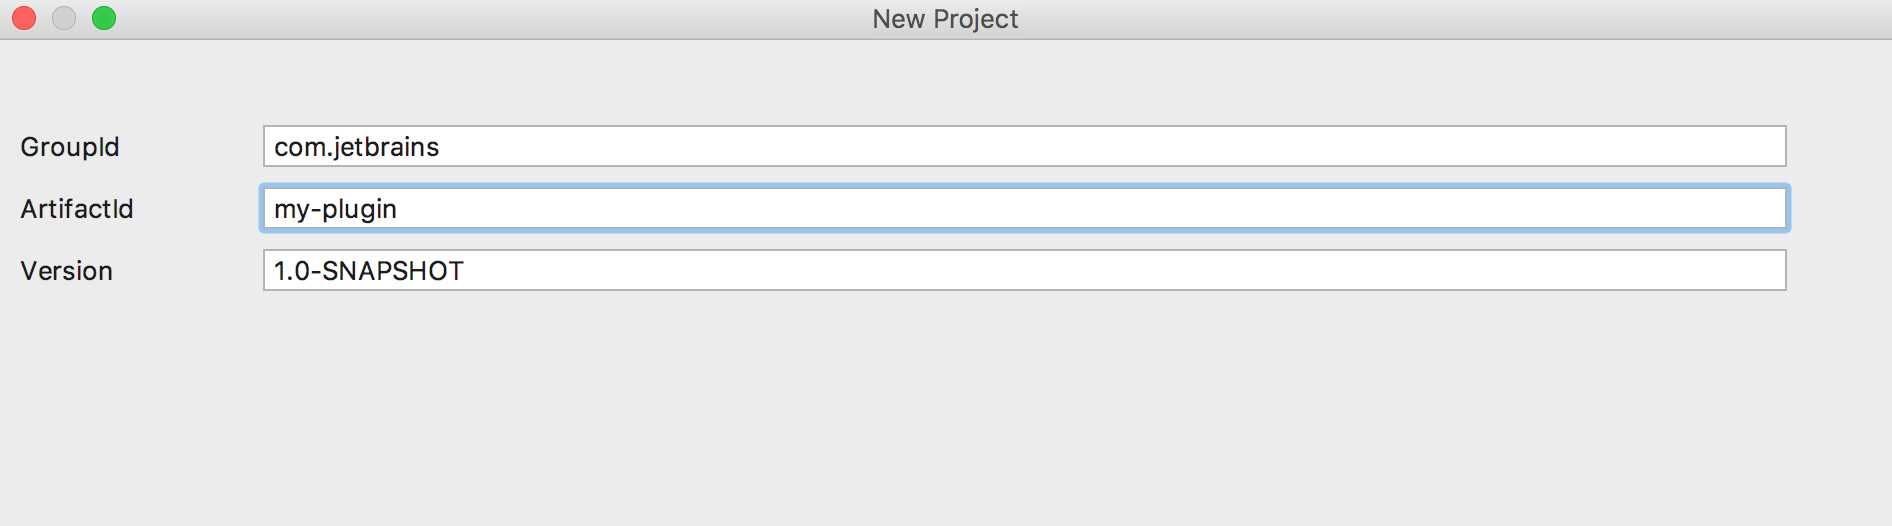
您需要指定组ID,工件ID和版本:
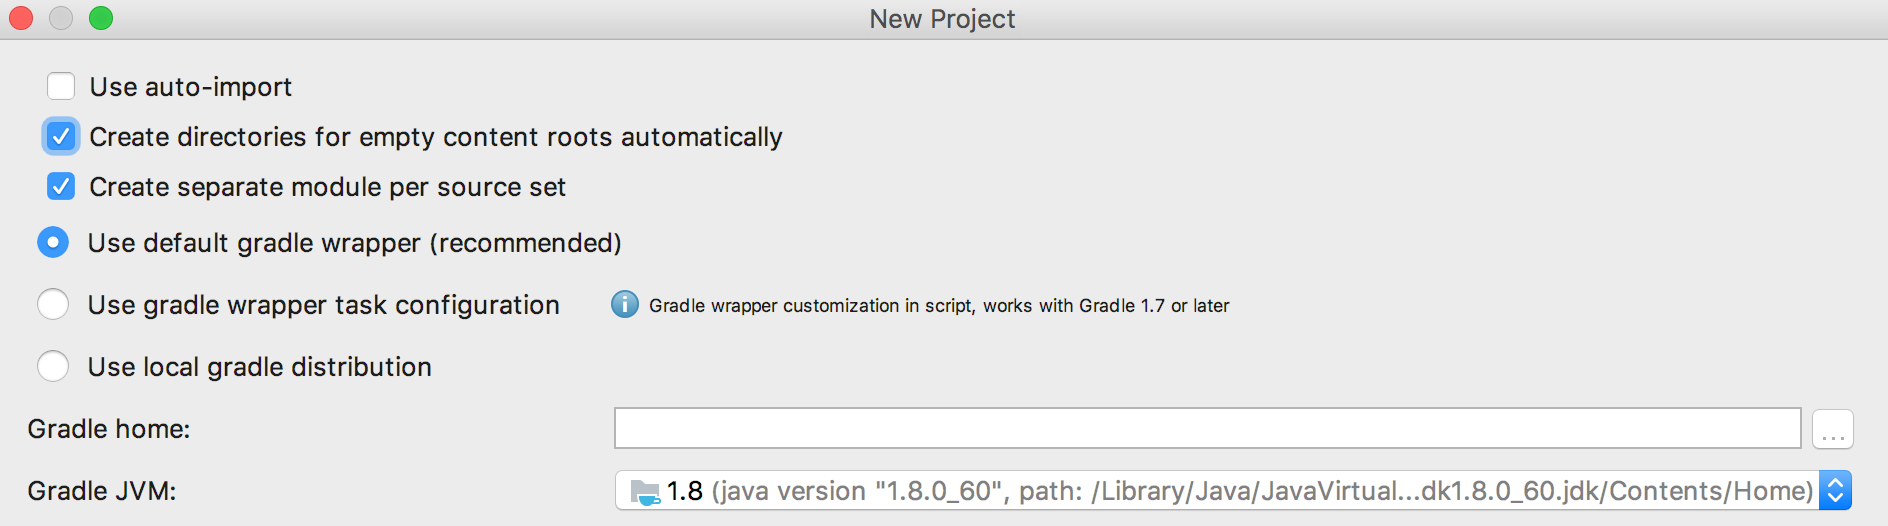
建议选择“使用默认gradle包装器”选项,这样IntelliJ IDEA将安装运行Gradle任务所需的一切。
Finally, specify a JVM Gradle will use, it can be the Project JDK. You also configure this path once the project is created via Settings | Build, Execution, Deployment | Build Tools | Gradle.
1.3配置Gradle插件项目
IntelliJ平台gradle-intellij-plugin提供对基于Gradle的插件项目的支持。
See the Gradle plugin README for more information.
For example, to configure the Sandbox Home directory’s location include the following in the project’s build.gradle file:
intellij {
  sandboxDirectory = "$project.buildDir/myCustom-sandbox"
}
See the IDE Development Instances page for more information about default Sandbox Home directory locations and contents.
1.4 Add Gradle Support to an Existing Plugin
要向现有插件项目添加Gradle支持,请在根目录下创建一个build.gradle文件,至少包含以下内容:
buildscript {
    repositories {
        mavenCentral()
    }
}

plugins {
    id "org.jetbrains.intellij" version "0.4.8"
}

apply plugin: 'idea'
apply plugin: 'org.jetbrains.intellij'
apply plugin: 'java'

intellij {
    version 'IC-2016.3' //IntelliJ IDEA 2016.3 dependency; for a full list of IntelliJ IDEA releases please see https://www.jetbrains.com/intellij-repository/releases
    plugins 'coverage' //Bundled plugin dependencies
    pluginName 'plugin_name_goes_here'
}

group 'org.jetbrains'
version '1.2' // Plugin version
然后,使用系统“PATH”上的Gradle可执行文件,在系统的命令行上执行以下命令:
gradle cleanIdea idea
This will clean any existing IntelliJ IDEA configuration files and generate a new Gradle build configuration recognized by IntelliJ IDEA. Once your project refreshes, you should be able to view the Gradle tool window displayed under View | Tool Windows | Gradle. This indicates that IntelliJ IDEA recognizes the Gradle facet.
1.5运行一个简单的插件
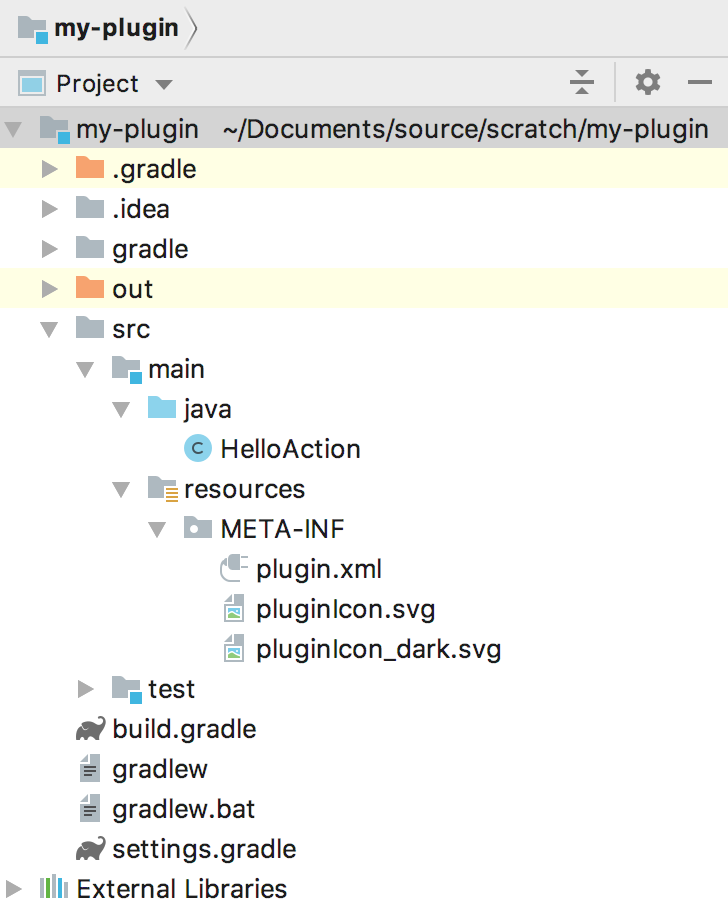
现在在Java文件夹中添加一个新的HelloAction类,在META-INF文件夹中添加plugin.xml和pluginIcon.svg`文件。
有关pluginIcon.svg文件的更多信息,请参阅插件图标页面。
import com.intellij.openapi.actionSystem.*;
import com.intellij.openapi.project.Project;
import com.intellij.openapi.ui.Messages;

public class HelloAction extends AnAction {
  public HelloAction() {
    super("Hello");
  }

  public void actionPerformed(AnActionEvent event) {
    Project project = event.getProject();
    Messages.showMessageDialog(project, "Hello world!", "Greeting", Messages.getInformationIcon());
  }
}
<idea-plugin>
  <id>org.jetbrains</id>
  <name>Hello Action Project</name>
  <version>0.0.1</version>
  <vendor email="dummy" url="dummy">dummy</vendor>

  <depends>com.intellij.modules.lang</depends>

  <extensions defaultExtensionNs="com.intellij">
  </extensions>

  <actions>
    <group id="MyPlugin.SampleMenu" text="Greeting" description="Greeting menu">
      <add-to-group group-id="MainMenu" anchor="last"/>
      <action id="Myplugin.Textboxes" class="HelloAction" text="Hello" description="Says hello"/>
    </group>
  </actions>

</idea-plugin>
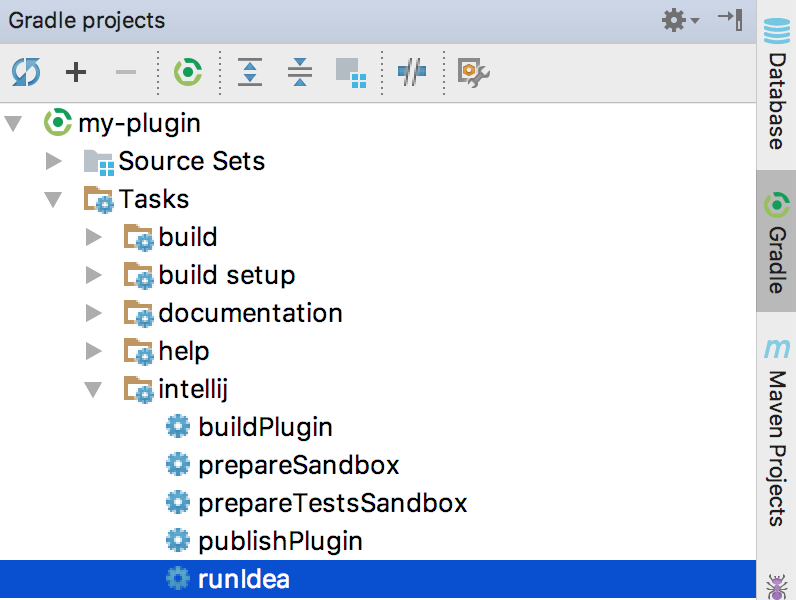
打开Gradle工具窗口并搜索runIde任务。
如果它不在列表中,请点击顶部的“刷新”按钮。
双击它以运行它。
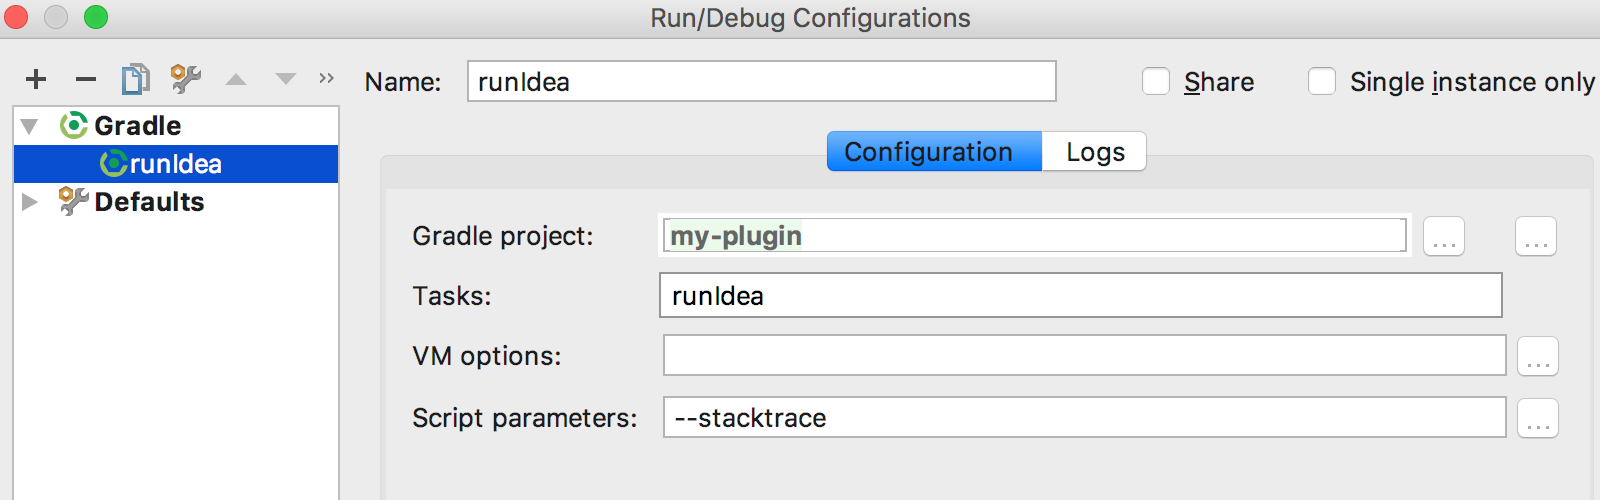
或添加新的Gradle Run配置,配置如下:
启动新的Gradle运行配置。
在“运行”窗口中,应显示以下输出。
最后,当IDE启动时,** Help **菜单右侧应该有一个新菜单。
您的插件现在已在Gradle上配置。